How to Whitelist an Email in Gmail, Outlook, and Spike


In a world where spam filters and security protocols stand guard over your inbox, there’s an unsung hero quietly ensuring that crucial emails make it through the digital maze. Imagine this: a VIP list that guarantees your important emails bypass the chaos of spam and reach you uninterrupted. This is the power of an email whitelist.
But what exactly is this elusive whitelist, and why should you care about it? Dive into the world of email whitelists and discover how this simple yet powerful tool can transform your email management, streamline communication, and bolster your security.
What is an Email Whitelist?
An email whitelist is a list of approved email addresses or domains that are permitted to bypass spam filters and other security measures to reach a recipient’s inbox. In essence, if an email address or domain is on the whitelist, emails from that source are considered trustworthy and are allowed through the email security gatekeepers, such as spam filters or firewalls.
I’s a bit like creating a trusted list of contacts or sources whose emails are permitted past the stringent spam filters you may have in place. You’re saying, “I know this source, and I want to receive their emails without any interference,” and this ensures that you receive important messages promptly, allowing you to streamline communication channels and improve security.
Whitelisting vs. Blacklisting
Blacklisting:
Blacklisting is when you tell your email to banish specific addresses or domains to the spam folder, never to be seen again (or at least until you decide to release them).
Whitelisting:
Whitelisting, on the other hand, takes a more proactive approach. It ensures important emails from senders you know and trust don’t get lost in the digital purgatory of the spam folder.
How Does Email Whitelisting Work?
Whitelisting is a user-controlled process. You, the recipient, decide who gets expedited service. Different email providers have slightly varying methods, but the essence remains the same.
You typically navigate to your email settings and designate specific email addresses or entire domains (like companyname.com) as safe senders. These senders then get flagged by your email client as trustworthy, ensuring their messages waltz past the spam filter and straight to your inbox.
The whitelisting process involves several steps:
-
Identification
Identify the email addresses or domains you want to include on the whitelist. This could be your company’s domain, a trusted partner, or a crucial service provider.
-
Configuration
Access your email client or security settings. Different platforms have various methods for whitelisting:
- In Email Clients: For clients like Gmail or Outlook, you can usually add addresses to your contacts or safe senders list.
- In Spam Filters: If you’re using a dedicated spam filter, you may need to enter the addresses or domains into a specific whitelist section in the filter’s settings.
-
Verification
Ensure that emails from these whitelisted addresses are correctly bypassing filters and reaching the inbox. This may involve testing or reviewing spam reports.
-
Maintenance
Regularly update your whitelist to accommodate new trusted sources and remove outdated entries.
Why Is it Important to Whitelist an Email?
Whitelisting email senders offers several advantages:
Avoid Missing Important Communications
Whitelisting ensures that emails from important contacts, such as clients, colleagues, or family members, are not mistakenly filtered into your spam or promotions folder.
It acts as a failsafe mechanism against the limitations of spam filters, explicitly allowing emails from your trusted contacts to bypass filters and establishing a direct pathway to your inbox.
This assurance can be invaluable, especially when time-sensitive or critical information is at stake. Whether it’s a client’s business proposal, a colleague’s urgent message, or an important family update, whitelisting ensures that no essential communication slips through the cracks.
Enhance Security
Whitelisting adds an extra layer of security by reducing the chances of you falling victim to phishing scams or malicious emails. Basically, It ensures that only trusted sources can directly deliver emails to your inbox.
When you whitelist a sender or domain, you declare that you implicitly trust the source. This trust is reciprocated by your email client, which grants special privileges to these whitelisted entities.
This means that since only known and trusted sources can bypass the filters, the chances of you falling victim to phishing scams or opening malicious attachments are reduced.
Improve Workflow Efficiency
The constant influx of messages we receive, both important and trivial, can sometimes lead to a cluttered and overwhelming inbox. Sifting through a barrage of irrelevant emails can be time-consuming and counterproductive.
Thankfully, whitelisting can also serve as a curator for your inbox, ensuring that you receive and interact with the most pertinent and valuable communications while sending less significant ones to spam or other folders.
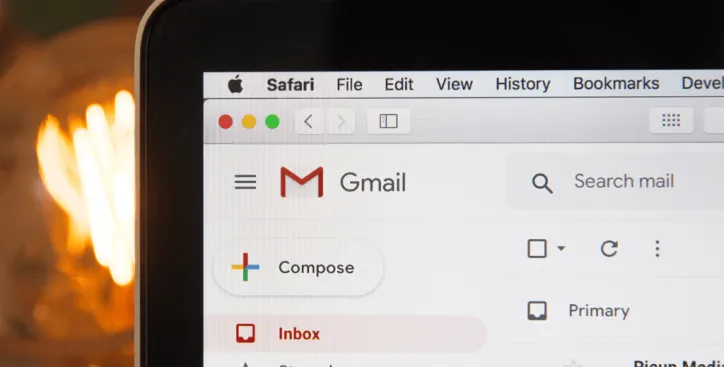
How to Whitelist Emails in Gmail
- Open Gmail — Go to your Gmail inbox.
- Search for the Sender — Locate an email from the sender you want to whitelist.
- Open the Email — Click on the email to open it.
- Click on the Three Dots — In the upper-right corner, click on the three vertical dots.
- Select “Filter messages like these” — This will open the Gmail spam filter options.
- Define the Filter Criteria — Ensure that the criteria match the sender or domain you want to whitelist.
- Click on “Create filter” — This opens a new menu.
- Check “Never send it to Spam” — This ensures that emails from this sender are not marked as spam.
- Click on “Create filter” — The filter is now set.
How to Whitelist Emails in Yahoo
- Open Yahoo Mail — Go to your Yahoo Mail account.
- Click on “Settings” — It looks like a cogwheel icon in the upper-right corner.
- Select “More Settings” — This will open the settings menu.
- Click on “Filters” — This is on the left-hand side.
- Click on “Add” — In the Filters section, click on “Add” to create a new filter.
- Name Your Filter — Give your filter a name (e.g., “Whitelist”).
- Define Filter Criteria — Specify the sender or domain you want to whitelist.
- Set the Action to “Inbox” — Ensure that emails matching this filter go to your inbox.
- Save the Filter — Click on “Save” to implement the whitelist filter.
How to Whitelist Emails in iCloud
- Open iCloud Mail — Go to iCloud Mail.
- Click on the Gear Icon — It’s in the bottom-left corner.
- Select “Rules” — This will open the rules menu.
- Click on “Add a Rule” — This allows you to create a new rule.
- Define the Condition — Specify the criteria for the whitelist (e.g., sender’s email address).
- Set the Action to “Move to Inbox” — This ensures that emails matching this rule go to your inbox.
- Save the Rule — Click on “Done” to implement the whitelist rule.
How to Whitelist in Emails in Spike
- Open Spike — Log in to your Spike account.
- Find the Email you Want to Whitelist — Find the email you want to whitelist and double check the domain is correct.
- Right-click to Access Settings — This will open more options.
- Click on Priority — This will ensure emails from this specific domain always end up in your Priority inbox.
How to Whitelist Emails in Outlook
- Open Outlook — Go to Outlook in your web browser.
- Click on the Gear Icon — It’s in the top-right corner.
- Select “View all Outlook Settings” — This will open the settings menu.
- Go to “Mail” > “Junk Email” — Navigate to the Junk Email settings.
- Under “Safe Senders and Domains” — Add the email addresses or domains you want to whitelist.
- Save Changes — Click on “Save” to confirm the whitelist settings.
(Please note that the process might vary slightly depending on the version of Outlook you’re using.)
Email Best Practices Beyond Whitelisting
While whitelisting is an essential part of email security, it’s only one aspect of a broader strategy. Here are some additional best practices:
-
•
Unsubscribe
Don’t let unwanted emails pile up. Unsubscribe from mailing lists you no longer engage with.
-
•
Use Spam Filters Effectively
Most email providers have decent built-in spam filters. Train your filter by marking spam emails as spam and marking important emails that land there as “not spam.” This helps the filter learn your preferences.
-
•
Email Security
Learn to recognize phishing attempts and other email scams. Awareness is a critical component of maintaining email security.
-
•
Monitor Email Activity
Regularly review email logs and activity reports to detect any unusual patterns or potential security breaches.
-
•
Implement Multi-Factor Authentication (MFA)
Secure email accounts with MFA to add an additional layer of protection against unauthorized access
-
•
Create Folders
Organize your inbox with folders for work, social, and personal emails. This keeps things tidy and helps you prioritize.
Conclusion
Whitelisting emails is a critical practice to ensure secure communication in a world where email overload is a real issue. By prioritizing those senders and domains that you know, individuals and businesses can benefit from more efficient email management while simultaneously avoiding essential emails being marked as spam to guarantee that vital information is always within reach.
Additionally, whitelisting can add an extra layer of security, safeguarding against phishing scams and malicious content by permitting only known and trusted sources access to your inbox.
Finally, as we all try to streamline and organize our workflows, whitelisting can bring focus to your inbox, allowing you to be more productive and concentrate on the things that really matter!
For more information on how Spike Teamspace can revolutionize the way you communicate, contact Spike today and explore the blog.
Gain Communication Clarity with Spike
You may also like
How to Archive Emails in Gmail, Outlook,& Spike
Discover why it's important to archive email for both you and your business. Get organized and ensure all of your data is there when you need it.
Read MoreMastering Email Triage for Busy Professionals
Just like a battlefield medic, email triage helps you quickly identify the critical messages that need your immediate attention, while efficiently sorting the rest for later or delegating them altogether.
Read MoreElevate Your Email Game: The 12 Best AI Writers to Try in 2024
Struggling with emails? Ditch writer's block! This guide reviews the TOP 12 AI email writing assistants to craft killer emails in seconds. Improve efficiency & get back to what matters most!
Read More